Table of Contents
ToggleSetting up a home theater doesn’t require a finished basement or dedicated room the size of a cinema, a small home theater can deliver the movie-night experience in a bedroom, garage corner, or living room nook. Whether you’re working with a 100-square-foot converted closet or a modest den, the right equipment and layout choices make all the difference. This guide walks you through assessing your space, choosing essential components, and optimizing your setup so you can enjoy immersive audio and crisp visuals without very costly or requiring structural renovation.
Key Takeaways
- A small home theater can be built in 80–200 square feet (bedroom, garage corner, or closet) with equipment costs ranging from $500–$800 for basic setups to $5,000+ for high-end systems.
- Short-throw projectors or wall-mounted TVs (40–65 inches) are ideal for compact spaces; projectors need darker rooms while TVs work better with natural light and are simpler to install.
- Audio quality is critical in confined spaces—a soundbar ($150–$800) or 2.1 speaker system with a subwoofer delivers better results than cramming multiple speakers into a small home theater.
- Proper positioning and layout matter: keep seating 1.5–2.5 times the screen width away, mount the screen at eye level, and use dark materials, blackout curtains, and acoustic panels to absorb sound and light.
- Secure your TV or projector with proper mounting hardware into wall studs, run all cables before final installation, and calibrate audio and video settings after setup to ensure optimal performance and longevity.
Assess Your Space and Budget
Before buying anything, measure your room carefully and define what “small” means for your project. Most compact home theaters work in spaces between 80 and 200 square feet, think a spare bedroom, finished basement corner, or even a converted closet. Jot down the width, depth, and ceiling height: pay attention to existing windows, doors, and outlets, since these affect screen placement and cable routing.
Budget matters just as much. A bare-bones setup (projector, screen, basic speaker, seating) can run $500–$800. Mid-range systems typically cost $1,500–$3,000. High-end compact theaters push $5,000+. Decide your spending limit upfront so you’re not tempted by feature creep midproject. Remember: a well-planned $1,200 setup beats a chaotic $3,000 collection of mismatched gear. Also consider that a small space forgives smaller screen sizes and lower wattage speakers, you don’t need cinema-grade power to fill a closet.
Essential Equipment You’ll Need
Choosing the Right Projector or Display
Small spaces favor either a compact short-throw projector (which projects large images from just a few feet away) or a quality TV or monitor mounted on the wall. Projectors are popular because they create an immersive cinema feel and take up no floor space: but, they need a dark room to perform well. Short-throw models sit just 12–36 inches from the screen and project 80–150 inches diagonally, ideal for a 10-by-12-foot bedroom.
TVs and monitors (40–65 inches) are more practical if your room gets natural light or if you can’t fully blackout windows. They’re also cheaper, simpler to install, and don’t require a separate screen. Recent options from the best home theater projectors include models with 1080p or 4K resolution, LED or laser light sources, and HDMI inputs, look for brightness ratings of at least 2,000–3,000 lumens for decent visibility even with some ambient light. For a TV, aim for a 60Hz refresh rate and low input lag (under 30ms) if you plan to game.
Audio System Essentials for Compact Rooms
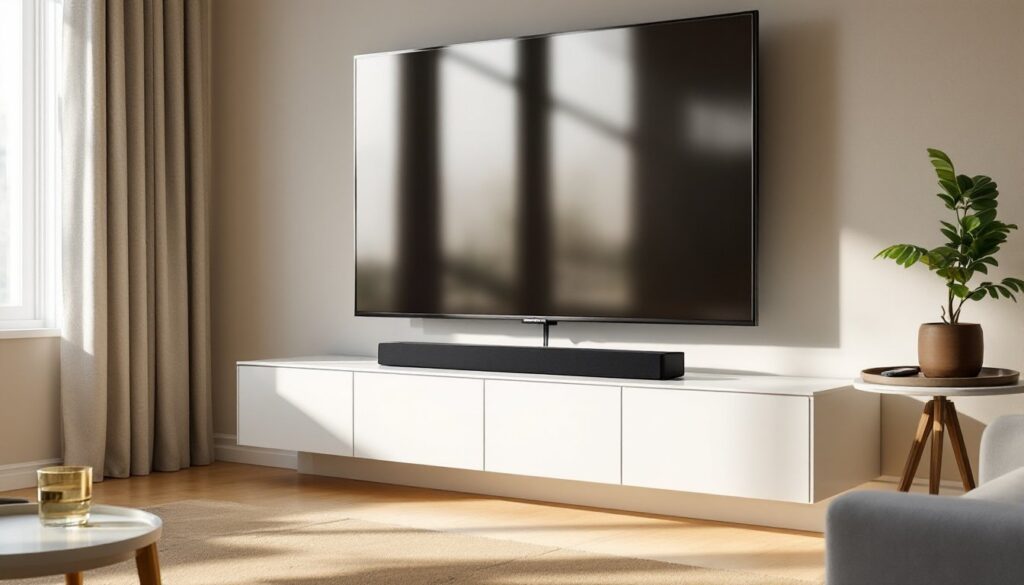
Sound matters more than most people realize, especially in a confined space where audio can feel cramped without proper placement. A single soundbar or compact 2.1 speaker system (two small satellites plus a subwoofer) works perfectly for small theaters. Soundbars range from $150 to $800 and mount directly above or below your display, delivering virtual surround sound and needing no additional wall space. The best soundbars offer Dolby Atmos support (3D audio that creates height cues) and are 36–50 inches wide to match typical TV sizes.
If you choose separate speakers, keep the setup simple: two front speakers flanking your screen, plus a powered subwoofer (8–10 inches) tucked in a corner to handle bass. Avoid stuffing too many speakers into a small room, they create dead zones and feedback. Mount front speakers at ear level when seated, and angle them slightly toward the center seating area. Position the subwoofer away from walls if possible (this reduces booming) or in a corner if space demands it. Wireless or passive systems can minimize cable clutter: just ensure your AV receiver or amplifier has enough inputs for your display and any gaming consoles.
Design and Layout Optimization
Maximize your small theater by thinking vertically and using the wall you’re projecting on (or mounting the TV to) as your anchor. Keep seating 1.5 to 2.5 times the screen width away, so a 60-inch TV looks best at 7.5–10 feet back. If your room is shorter, a 43–50 inch display works better than cramming a 75-inch TV against the far wall. Position the screen at eye level when seated: mount it 24–30 inches above your seating surface.
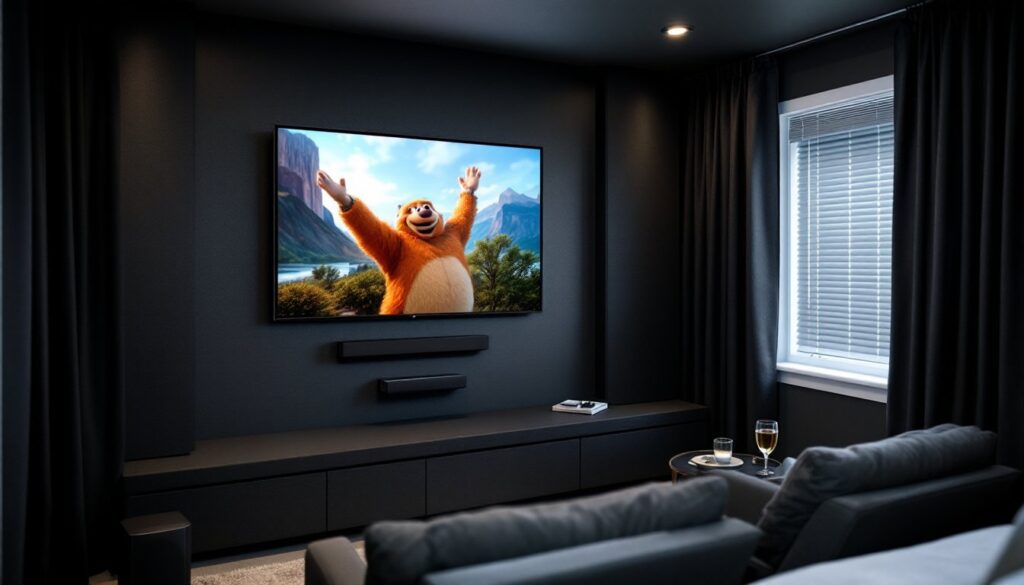
Use durable, dark-colored materials to absorb sound and light. Blackout curtains or panels reduce glare and external light intrusion, essential for projector use. Paint walls a dark gray or black (matte finish, not glossy) to minimize reflections. Acoustic panels behind and to the sides of your seating absorb echo: fabric-wrapped foam boards cost $30–$100 each and mount easily with adhesive strips or lightweight hardware.
Cable management sounds boring but prevents headaches. Plan runs from your source devices (streaming box, game console, cable box) to the receiver and then to speakers and display. Use conduit or cable clips (available at home improvement stores for a few dollars) to route cables behind baseboards or along the ceiling where they’re hidden. Label cables at both ends with painter’s tape and a marker so you can troubleshoot quickly later. Small home theater design ideas show how thoughtful layout and concealed wiring create a clean, professional look even in tight quarters.
Installation and Setup Tips
Start by mounting your display or screen first, before running any cables. Use a stud finder to locate wall studs if mounting a TV: a 55-inch TV weighs 60–80 pounds, so lag bolts or heavy-duty mounts into studs are non-negotiable. VESA-compatible TV mounts (a standard that indicates how far apart mounting holes are) come in tilt, swivel, and fixed styles, fixed mounts are cheapest and adequate if your viewing angle is static.
For projectors, a ceiling mount or wall mount keeps the lens parallel to the screen to avoid keystoning (image distortion). Measure and mark screw locations carefully: drill pilot holes to prevent drywall cracking. Once mounted, focus and zoom the projector image to fill your screen evenly.
Next, run all cables before installing acoustic panels or furniture. Use HDMI 2.1 cables for 4K content and low-latency gaming. Separate power cables from video cables to reduce electromagnetic interference, keep them at least 6 inches apart where possible. Test each input (streaming device, console, TV tuner) before mounting the receiver in its final spot or hiding cables inside conduit.
Calibrate your audio after installation. Position your seating first, then set speaker levels using an SPL (sound pressure level) meter or your AV receiver’s built-in calibration tool, most target 75dB at your main listening position. Subwoofer placement affects bass response: if you hear booming, move it to a different corner or closer to the center of the room. Finally, set your TV’s picture mode to Cinema or Movie (not Vivid) and enable any motion-smoothing features only for sports, they can make movies look unnatural. Let the system warm up for 30 minutes before critical viewing to reach optimal picture quality.
Conclusion
A small home theater is entirely achievable with thoughtful planning, reasonable gear choices, and honest installation work. Start by knowing your space and budget, pick display and audio hardware that fit your room’s size and light conditions, and don’t skip the prep work, layout, cable management, and calibration separate a frustrating setup from one you’ll actually use. Your compact theater won’t feel cramped if every piece is sized and placed correctly.