Table of Contents
ToggleConverting a metal barn into a livable space has become one of the most practical, and Instagram-friendly, housing solutions for budget-conscious homeowners. A barndominium tiny home blends agricultural aesthetics with efficient modern living, offering affordability, customization freedom, and a sense of self-sufficiency that traditional housing can’t match. Whether you’re drawn to the lower upfront costs, the creative design challenge, or simply the desire to own land and build it your way, understanding what goes into a barndominium conversion is essential before you commit. This guide walks you through the mechanics of planning, designing, and building a functional tiny home in a barn shell.
Key Takeaways
- A barndominium tiny home costs 30–50% less than conventional housing while offering customization freedom, lower land costs, and no HOA restrictions on rural acreage.
- Design for efficiency by dividing your barndominium into functional zones (sleeping, living, cooking, working, storage) with vertical space through sleeping lofts and multi-functional furniture to maximize every square foot.
- Structural, mechanical, and electrical systems are non-negotiable investments—hire licensed professionals for electrical ($2,000–$4,000), plumbing ($5,000–$15,000 if well/septic required), and engineer certification ($800–$2,000) to avoid code failures and safety hazards.
- Zoning and building permits are critical before buying land or starting construction; verify that your intended barndominium use is legally permitted by your county or township, as many jurisdictions are silent or restrictive on residential barndominiums.
- Trim labor costs by handling demolition and prep work yourself, sourcing reclaimed materials, and phasing the project over time, but budget 15–20% contingency for unexpected structural issues like rot, pest damage, or foundation problems.
- Banks are cautious with barndominium financing; traditional mortgages and FHA loans often don’t apply, so explore construction loans, personal financing, or lenders that accept barndominiums with certified code compliance.
What Is a Barndominium Tiny Home?
A barndominium is a residential dwelling built inside or from a barn structure, usually a metal pole barn or reclaimed timber frame. When paired with tiny home principles (roughly 400–1,000 sq ft of usable living space), a barndominium tiny home becomes an ultra-efficient alternative to conventional housing.
Unlike a traditional barn conversion, a barndominium tiny home prioritizes compact functionality from day one. You’re working with open floor plans, minimal hallways, and multipurpose zones. The barn’s skeleton, post-and-beam framing, minimal interior walls, and open ceiling height, gives you flexibility that a conventional house doesn’t offer. You can run electrical, plumbing, and HVAC without fighting existing infrastructure.
The appeal is straightforward: lower land costs (barns often sit on affordable rural acreage), a shell structure you can customize, and no neighborhood HOA restrictions on exterior appearance. You’re also working with a building envelope that’s already partially built, which can reduce labor compared to framing a house from scratch.
Why Barndominium Tiny Homes Are Gaining Popularity
The 2024–2026 housing market has made barndominiums increasingly attractive. First-time buyers and retirees are priced out of traditional markets: a barndominium can cost 30–50% less than a conventional home on equivalent land. Second, remote work and lifestyle shifts have people valuing space and land over proximity to urban centers. Third, the DIY and sustainable living movements have normalized alternative housing, people are no longer embarrassed to say they live in a converted barn.
Media coverage hasn’t hurt either. Everyone on Pinterest and real estate blogs is obsessed with the aesthetic: soaring timber ceilings, metal accents, open-concept kitchens, and minimalist finishes. But beneath the Instagram appeal is genuine economic sense. You own the land, control the build timeline, and can invest sweat equity instead of paying contractor markups. If you’re handy or willing to learn, you save tens of thousands in labor costs. Everyone On Pinterest Is Obsessed With Barndominiums covers the trend’s real-estate momentum and buyer motivations.
The environmental angle matters too. Reusing an existing barn structure is inherently more sustainable than clear-cutting land and framing a new house. You’re reducing material waste and embodied carbon from the start.
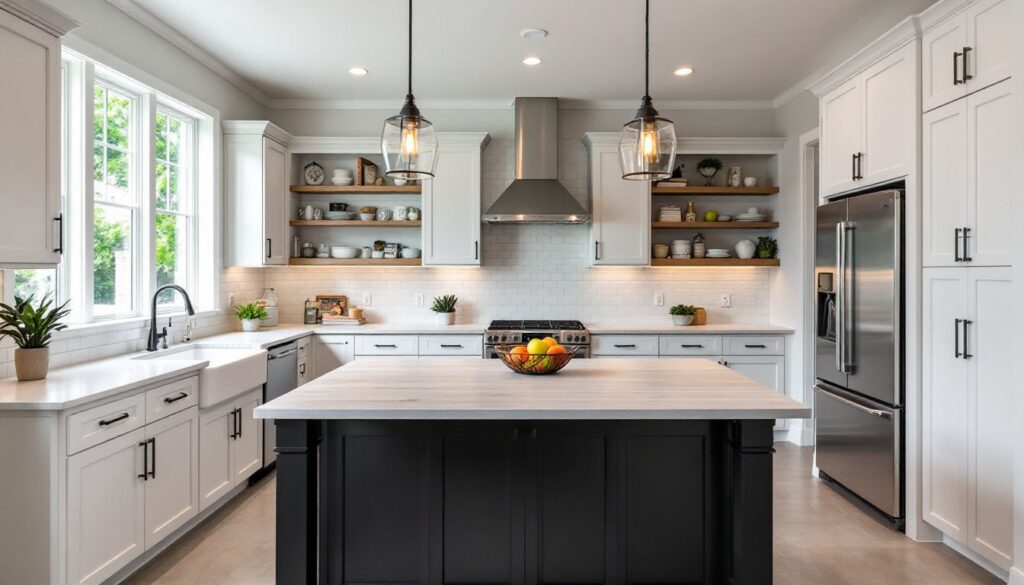
Design and Layout Strategies for Small Spaces
Designing a barndominium tiny home requires treating every square foot as strategic real estate. Unlike a large house, you can’t afford dead space or poor flow.
Start with zoning. Divide your barn into functional zones rather than rooms: sleeping, living, cooking, working, and storage. In a 600 sq ft barn, you might use the front third for an open living and kitchen, a sleeping loft above half the structure, and a compact bathroom and utility closet tucked into one corner. This approach keeps the main floor feeling spacious while stacking functions vertically.
Plan around natural light and airflow. Barns have few windows by default, so you’re adding them during the conversion. Larger windows on the south and west sides maximize passive solar heat in winter: operable windows on opposite walls create cross-ventilation in summer. If your barn has a high peaked roof, you can install clerestory windows (small windows near the roofline) to pull light deep into the space without sacrificing privacy or wall space.
Material choices amplify space. Light paint colors on walls and ceilings reflect light and make square footage feel larger. Polished concrete floors or light wood keep sight lines open. Avoid dark stains or heavy furniture that visually divides the floor plan.
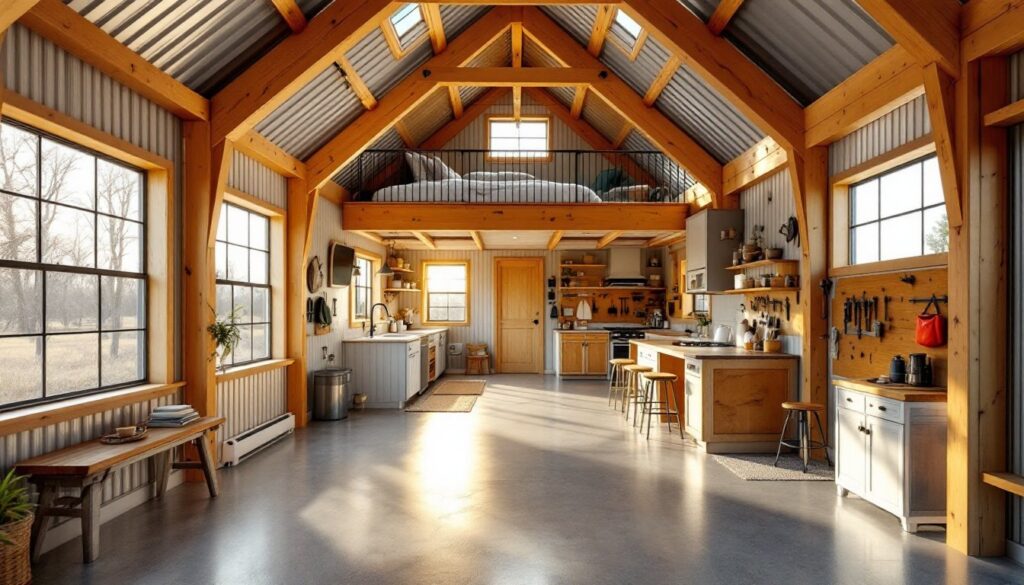
Maximizing Vertical Space and Multi-Functional Areas
Sleeping lofts are non-negotiable in tiny barndominiums. A 12-by-12-foot loft area (144 sq ft) accommodates a queen bed with storage underneath: you’re using overhead height that would otherwise go wasted. Open stairs or a ship’s ladder (a steep, space-saving staircase) provides access without eating floor space like a full staircase would.
Multi-functional furniture is your ally. A kitchen island can serve as storage, seating, prep surface, and dining table. Built-in shelving replaces freestanding bookcases. A murphy bed or sofa bed handles guest sleeping without a dedicated bedroom. Barn walls become storage: pegboards, wall-mounted shelving, and hooks keep tools, kitchen gear, and seasonal items visible but organized.
Don’t underestimate the psychological impact of visual breaks. A half-wall, a difference in ceiling height, or a shift in flooring material creates distinct zones without blocking sight lines. Barn aesthetics actually favor this, exposed posts and beams naturally create visual division without chopping up the space.
Fine Homebuilding covers framing and spatial design strategies for small spaces, including loft construction and open-plan acoustics.
Key Renovation and Building Considerations
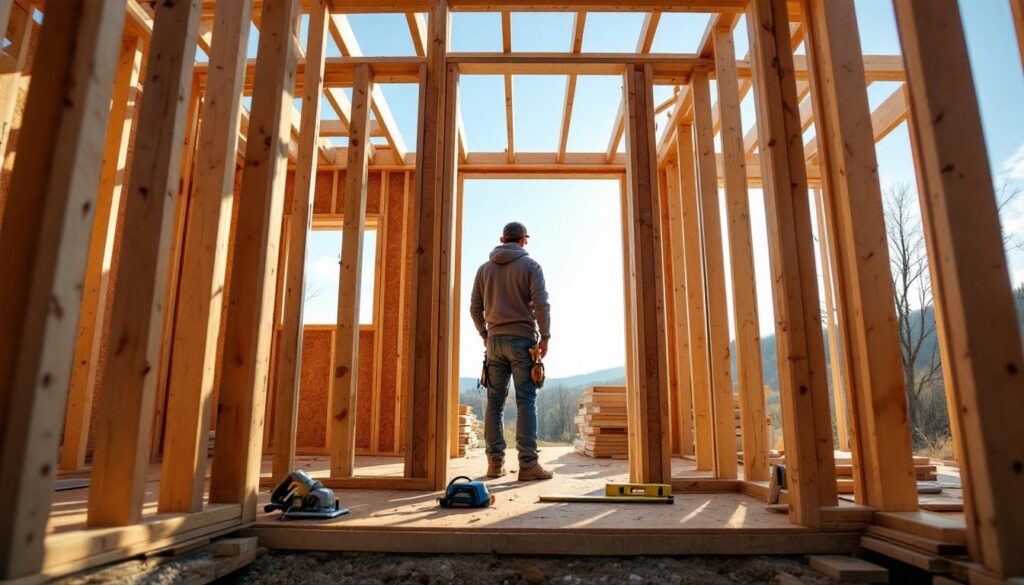
Converting a barn to a living space is not cosmetic work, it’s a structural, mechanical, and electrical overhaul. Skipping steps here will haunt you for years.
Structure and envelope. Start with a thorough inspection of the barn’s frame, roof, and foundation. Older timber barns may have rot, settling, or pest damage: metal pole barns need rust assessment. You’re looking for structural integrity before you invest a dime in interiors. Roof leaks are your enemy, water damage spreads fast and compounds costs. If the existing roof is marginal, plan to re-roof with proper ventilation and underlayment before finishing interiors. Budget $5,000–$12,000 for a metal roof on a 1,200 sq ft barn, depending on pitch and location.
Insulation and climate control. Barns weren’t designed for year-round living. They typically have none. You’ll need to add insulation to walls (cavity insulation plus rigid foam is common), the ceiling (dense batts or spray foam), and the floor if it’s above grade. R-value targets vary by climate: check your local energy code. Uninsulated barns are $25,000+ in heating and cooling costs annually.
Ventilation and dehumidification matter. An open barn plan with large temperature swings is uncomfortable. Mini-split heat pumps (ductless heating/cooling) work well in small barns because you skip running ducts through new walls. Budget $3,000–$6,000 for a two-zone system.
Electrical, plumbing, and mechanicals. These three systems are where most homeowners run into problems, and costs. Hire a licensed electrician to design the layout: barn circuits aren’t simple DIY territory. You’ll need to run conduit (metal or PVC tubing) for wiring, install adequate outlets and circuits for cooking and heating loads, and ensure grounding. A 200-amp service is standard: cost runs $2,000–$4,000 depending on your distance from the main utility pole.
Plumbing requires roughing in water supply and drain lines before walls and floors close up. A small bathroom, kitchen, and laundry hookup might need 50–100 feet of new pipe. Water heater sizing is important: a small tankless unit or compact tank water heater suits tiny homes. Drain lines slope at 1/4 inch per foot, non-negotiable for gravity flow. If municipal water and sewer aren’t available, you’re looking at a well and septic system, which adds $5,000–$15,000 and requires professional design and installation.
Zoning, Permits, and Legal Requirements
This is where enthusiasm hits reality. Not all rural land is zoned for residential use, and not all jurisdictions accept barndominiums as permanent dwellings.
Zoning and land use. Check with your county or township zoning office before buying land or a barn. Some rural areas allow agricultural structures only: others have minimum square-footage requirements for residential units. A few jurisdictions specifically support barndominiums: many are silent, which can create legal gray areas. Some counties require a barn to be a certain distance from property lines or highways. You need written confirmation that your intended use is permitted before construction starts.
Building permits. A barndominium conversion requires building permits in most jurisdictions, treat it as new construction, not a renovation. Your barn will need to meet current building codes: foundation requirements, wind and snow load ratings, egress windows (emergency exits from bedrooms), fire-rated materials in certain applications, and electrical/plumbing/mechanical standards. The IRC (International Residential Code) and NEC (National Electrical Code) are the baseline: your state or county may have amendments.
Permit costs vary widely, $500 to $3,000 depending on your jurisdiction and barn size. Processing takes 2–6 weeks. Inspections happen at framing, mechanical rough-in, and final stages. If you’re converting an existing barn, expect the inspector to flag issues: missing roof ventilation, undersized electrical service, non-code-compliant egress, or foundation inadequacy. Budget for corrections: they’re rarely cheap.
Professional help is not optional. You need a structural engineer to certify the barn can handle the new loads (insulation, flooring, mechanical systems, occupants). Cost is $800–$2,000. You need an electrician and plumber: DIY work here can fail inspection and create safety hazards. You may need an architect or designer if the barn’s layout requires significant modification. Your insurance company will have conditions too, some won’t insure barndominiums until they meet specific code thresholds.
Financing and legal ownership. Banks are cautious with barndominiums. Traditional mortgages often require a finished house with a kitchen and full bathroom on a specific amount of land. Some lenders accept barndominiums if code compliance is certified: others won’t. FHA loans typically don’t apply. Expect to shop lenders or use personal financing (cash, home equity lines, or construction loans). Real Simple has guides on home organization and financing approaches for nontraditional living spaces.
Cost-Effective Tips for Building Your Barndominium Tiny Home
Labor is the biggest cost driver in a barndominium build. Here’s how to trim it:
Do prep work yourself. Demolition, site cleanup, and basic framing prework are doable DIY tasks if you have time and a few extra hands. Breaking out old stalls, cleaning, and sorting salvageable materials can save $2,000–$5,000 in labor. Wear a respirator if the barn has dust, mold, or asbestos (older buildings often do, test first).
Source materials strategically. Reclaimed wood from the barn itself can be milled and reused for flooring or accents. Metal siding can stay as interior finishes. New materials: shop bulk lumber yards instead of big-box stores for framing: prices are lower on volume. Concrete floors are cheaper than wood: polish or stain them for finished appearance. Used fixtures from salvage yards or online marketplaces can be $500–$1,000 cheaper than new bathroom and kitchen fixtures.
Phase the project. You don’t have to finish everything at once. Get the barn weathertight (roof, windows, doors) and add insulation, then live in it while you finish interiors over time. This spreads costs and lets you work at a sustainable pace. A weathertight, heated shell with a basic toilet and kitchenette is livable: refinished flooring and final trim can wait.
Hire professionals for the heavy lifting. Electrical and plumbing are code-critical: don’t cut corners. HVAC sizing and installation matter for comfort. Structural work and roofing are safety-critical. Where you can DIY (finish work, painting, simple framing) is where you save.
Track every permit and inspection. A failed inspection means rework and delays. Use the inspection process to catch code issues early when fixes are cheaper. Final sign-off from the building department protects your investment and makes future resale or refinancing possible.
Budget conservatively. Expect the unexpected. Older barns often have hidden rot, pest damage, or foundation issues that surface during demolition. Soil conditions may require costly drainage solutions. Add 15–20% contingency to your estimate. A $50,000 build can easily become $65,000 once reality sets in.