Table of Contents
ToggleSetting up an Alexa home theater system isn’t about splurging on premium equipment you don’t need, it’s about creating a streamlined, voice-controlled entertainment hub that actually works the way you want it to. Whether you’re streaming movies, gaming, or listening to music, an Alexa home theater setup lets you control everything from one command. This guide walks you through the essential equipment, installation process, and configuration steps to build a functional, scalable system that grows with your needs. You don’t need to be an AV technician to pull this off: a handy homeowner with basic troubleshooting skills can tackle it in a weekend.
Key Takeaways
- An Alexa home theater system centralizes entertainment control through voice commands, eliminating the need for multiple remotes and enabling automation routines like dimming lights and adjusting temperature simultaneously.
- Building a functional Alexa home theater requires three core components: a 4K TV or projector, quality audio equipment (soundbar or surround system), and an Alexa-enabled device like Echo Studio or Echo Dot to orchestrate the setup.
- Proper cable management and component placement are critical to a clean installation—run cables through raceways before mounting, position soundbars at ear level, and place surrounds 1–2 feet above ear level at 90–110 degrees from center.
- Most homeowners can complete an Alexa home theater setup in a weekend with basic tools, standard HDMI/power connections, and DIY mounting techniques—professional installation isn’t necessary for straightforward installations.
- Voice command recognition improves dramatically when the Alexa device is properly positioned in the room; test placement from different distances to avoid acoustic dead zones and ensure consistent command responsiveness.
- Create automation routines in the Alexa app for common scenarios like “Movie Night” to simultaneously control lights, thermostat, shades, and notifications, transforming your system into a seamless, intelligent entertainment hub.
Why Alexa-Enabled Home Theater Systems Are Worth the Investment
An Alexa home theater system centralizes control in a way that makes everyday entertainment genuinely easier. Instead of hunting for three remotes, you speak a command and it happens, lights dim, projector powers on, sound adjusts, and your movie starts. That convenience compounds once you set up automation routines.
Beyond convenience, Alexa integration opens up real functionality. You can sync your system with smart lights, smart plugs, and thermostats to create immersive experiences. A “Movie” scene might dim lights, close shades, adjust room temperature, and mute notifications in one go. You’re not paying extra for novelty: you’re paying for a system that adapts to how you actually use your space.
Voice control also handles the mundane stuff, pausing playback when someone knocks on the door, adjusting volume without leaving your seat, or checking the weather before you turn on the outside lights. For families, an Alexa system means everyone can control entertainment without fumbling through menus. Kids can request songs. Partners can pause without a remote. That’s real-world value.
Essential Equipment for Your Alexa Home Theater Setup
Your core setup needs three things: a display, audio components, and an Alexa-enabled device that orchestrates everything. The beauty of Alexa is that you don’t need proprietary hardware, you can mix and match brands and scale up over time.
Display options depend on your room size and viewing distance. A 4K TV (55–75 inches for typical living rooms) is the straightforward choice. If you’re building a dedicated theater room, a projector with a 100+ inch screen creates immersion but requires darkening and sound isolation. Either works with Alexa.
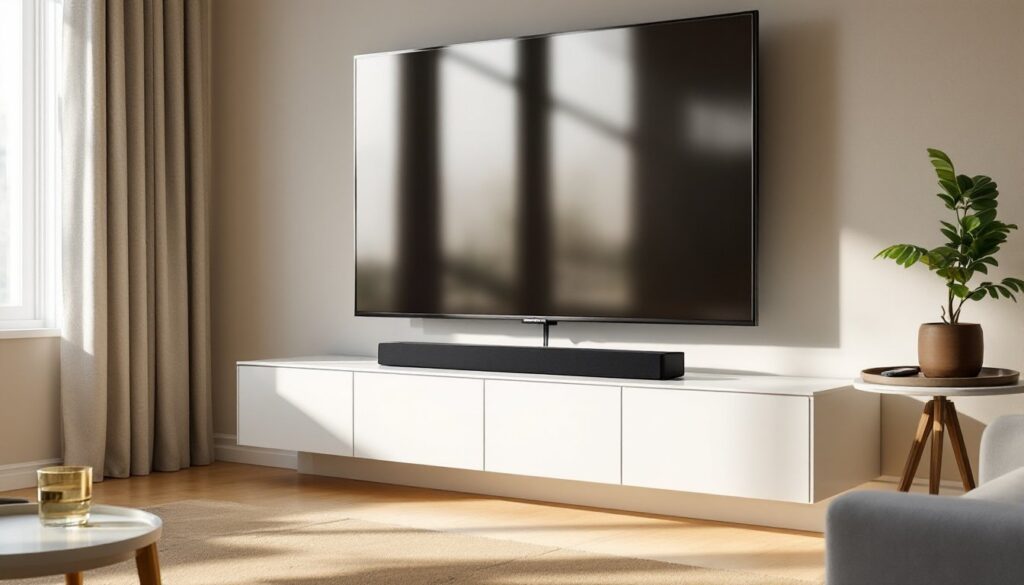
Audio is where most people skimp, then regret it. A TV’s built-in speakers aren’t adequate for a “theater” experience, they’re thin and directional. You need a soundbar or a proper surround system. A quality soundbar (look for Dolby Atmos support) costs $300–$800 and handles most living rooms. If you’re serious, a 5.1 or 7.1 surround setup with a dedicated subwoofer ($1,500+) transforms the experience. Start with a soundbar: add surrounds later if the budget allows.
Your Alexa hub is typically an Echo Dot (budget), Echo Show (with screen), or Echo Studio (premium audio). The Echo Studio doubles as a speaker, which is useful. The Echo Show adds a screen for quick visuals. Neither is required, even a basic Echo Dot works, but speaker quality matters for everyday listening.
Step-by-Step Installation and Configuration Guide
Installation is straightforward if you plan the layout first. Measure your viewing distance, calculate the ideal TV size (a rule of thumb: screen width should be 1/3 to 1/2 of your viewing distance), and check wall capacity before mounting. Most modern TVs mount securely with a standard articulating arm: use studs for load-bearing support, and always follow the TV manufacturer’s weight and VESA pattern specs.
Wire management is the unglamorous part that separates a tidy install from a rats-nest behind the TV. Run HDMI cables, power, and audio lines through cable raceways or behind-wall conduit before you mount the display. If running cables through walls, use low-voltage conduit rated for your region’s codes and drill pilot holes to avoid hitting studs or existing wiring. A stud finder and a small drywall saw make this painless.
For audio, position your soundbar at ear level when seated (usually on a TV stand or wall-mounted below the screen). If adding surrounds, place them 1–2 feet above ear level at 90–110 degrees from the center listening position. The subwoofer goes in a corner or against a wall to reinforce bass without directional cues.
Power management matters. Use a surge-protected power strip with enough outlets for your TV, soundbar, and any additional components. If you’re adding a lot of gear, a dedicated circuit to your home theater area prevents brownouts when other appliances run. You don’t need a professional electrician for a power strip, but if you’re adding a new circuit, call one, DIY electrical work beyond basic outlet swaps is dangerous and often violates local code.
Maximizing Your Alexa Home Theater Experience
Once your gear is mounted and powered on, the Alexa part is mostly software. Download the Alexa app on your phone, add your Echo device, and connect it to your home Wi-Fi (use the 5GHz band if available for faster streaming). Then link your streaming services, Netflix, Plex, Prime Video, directly to Alexa. This lets you say “Alexa, play The Office on Netflix” without hunting through menus.
Create automation routines for common scenarios. A “Movie Night” routine could turn off lights, lower the thermostat, close smart shades, and mute notifications in one voice command. A “Good Night” routine powers off the TV and closes everything down. These routines are set up in the Alexa app under Routines and take minutes to configure.
Audio optimization involves a few tweaks. Most soundbars have an app or remote EQ adjustment. Spend an afternoon tweaking treble and bass to match your room’s acoustics, don’t just crank the bass. If you add multiple rooms with Alexa speakers, use Multi-Room Music in the app to sync playback across zones. That transforms your whole home into a coordinated system.
One practical tip: a hands-on test revealed that setting up an Alexa works smoothly when you assign each device to its proper room in the Alexa app first. Avoid overlapping room names, or voice commands get confused about which device to control.
For ongoing satisfaction, your system should feel invisible during use. If you’re constantly fumbling with remotes or saying commands twice, something’s misconfigured. Test voice recognition in your setup, move around the room and try commands from different distances. Many people find their initial placement of the Alexa device works, but acoustic dead zones (behind furniture, in corners) reduce voice pickup. A small repositioning often solves this. Don’t skip this step: a well-positioned Alexa device is the difference between a frustrating setup and one that works every time.
Conclusion
Building an Alexa home theater comes down to solid fundamentals: appropriate display size and audio quality, clean cable management, proper component placement, and straightforward software setup. You don’t need cutting-edge gear or professional installation to get a system that delivers real value. Start with a good TV and soundbar, add an Alexa device, and let voice control make entertainment effortless. From there, automation routines and multi-room audio expand your system’s utility. Most homeowners can finish a basic setup in a weekend. The payoff, entertainment that responds to your voice and your schedule, makes it worth the effort.